About the Recipe
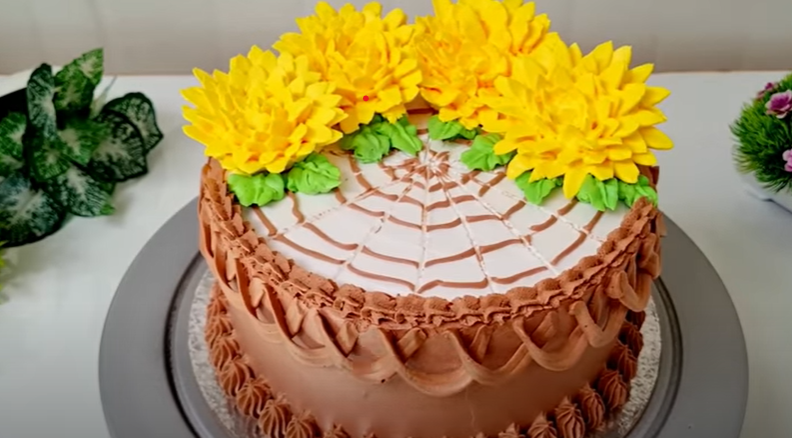
Today we are going to make a wonderful 3D flower design on a home-baked chocolate cake. All we need is just a skewer, a tooth prick and a few nozzles. Ecobake helped in getting the perfect shape for the cake without it sticking to the tin.
Watch recipe video
Ingredients
- Chocolate Cake
- Whip Cream
- Chocolate Ganache
- Egg Yelow Colour Food Gel
Directions
- Make a chocolate cake using a 6 inch cake tin. Line it with Ecobake baking 'n' cooking paper for better results. Bake the cake for 40 minutes in a pre-heated oven or stove. Now unmould the cake and keep it ready for frosting.
- Mix chocolate ganache with whip cream and whisk until it's frothy. Use this cream for frosting the cake. You can smoothen the top and sides of the cake with a spatula or cake scraper. Transfer chocolate cream into a piping bag and cover the sides with the cream.
- Again, smoothen the sides with the help of a cake scraper. Take a skewer and make a pattern as shown. Using a skewer, make a swirl pattern and draw eight lines as shown in the video.
- Draw 1 line each between the two lines, like a cobweb pattern. Transfer chocolate cream into a piping bag with a 2C or closed star shape nozzle. Stroke upwards and make the base pattern as shown. With this, the base design is completed.
- Practice your weaving or garland pattern on a skewer before attempting it on the cake. Take a small petal nozzle piping bag and transfer the cream into it. Make a hanging garland pattern on the top of the cake.
- Mix egg yolk gel food color with whipped cream. Transfer bright yellow color cream to a No. 35 nozzle piping bag. You can use a nail to make unique sunflowers using Noor No 36 Nozzle.
- If you do not have a nail, you can use a flat-base bowl or tumbler. Make small petals using the nozzle for making a sunflower. Place the sunflower on top of the cake using a knife.
- Repeat the same steps to make more sunflowers. You can also make leaves using Noor 13 or small star shaped Nozzle. Use chocolate cream to make cake top border.